
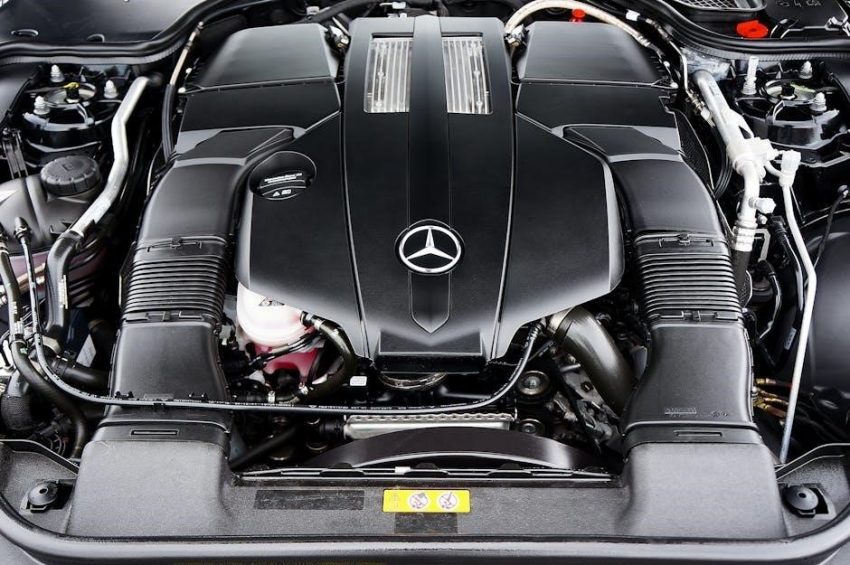
Valve guide replacement is a precision procedure vital for engine health, involving removing worn guides and installing new ones. This impacts overall engine functionality.
Why Valve Guides Matter
Valve guides are crucial components ensuring precise valve movement, maintaining proper sealing, and optimizing engine performance. They center the valve stem, preventing side loads and wear on valve seats. Proper valve guide function directly impacts combustion efficiency and reduces oil consumption. Replacing worn guides restores these critical functions, contributing to engine longevity and power output, ultimately safeguarding overall engine health.
Understanding Valve Guide Wear
Valve guide wear stems from constant contact with the valve stem, exacerbated by heat and friction. Over time, this leads to increased valve stem clearance, causing oil to enter the combustion chamber and resulting in blue smoke. Worn guides also contribute to valve seat damage and reduced engine compression. Recognizing these signs is key to timely replacement, preventing further engine deterioration.
Tools and Materials Required
Successful valve guide replacement demands specialized tools, essential hand tools, and correct replacement parts for precision work and optimal engine performance.
Specialized Valve Guide Tools
Valve guide tools are crucial for accurate removal and installation. A valve guide driver is essential for pressing out old guides and inserting new ones without damage. Reamers precisely size newly installed guides to the correct internal diameter, ensuring proper valve stem fit. Specialized pullers aid in stubborn guide removal, while honing tools refine the bore for optimal performance. Investing in quality tools guarantees a successful and reliable valve guide replacement;
Essential Hand Tools
Beyond specialized tools, several hand tools are vital for valve guide replacement. A sturdy press, either bench or hydraulic, is needed for guide removal and installation. Precision measuring tools, like micrometers and calipers, ensure accurate guide sizing. Various sockets, extensions, and wrenches facilitate disassembly. A good set of punches and a hammer aid in stubborn component separation. Proper hand tool selection streamlines the process and minimizes potential damage.
Necessary Replacement Parts
Successful valve guide replacement demands procuring the correct parts. Obviously, new valve guides – in the appropriate material and size – are essential. Valve seals, which sit atop the guides, must also be replaced to maintain oil control. Consider new valve stem seals during the process. Gaskets for the cylinder head are crucial for reassembly, ensuring a leak-proof seal. Don’t forget valve springs if inspection reveals fatigue or damage.
Valve Guide Removal Techniques
Removing old valve guides requires specialized tools and techniques, including valve guide drivers, heating the cylinder head, and carefully pressing out the worn components.
Using a Valve Guide Driver
A valve guide driver is a crucial tool for both removal and installation. Selecting the correct size driver is paramount to avoid damaging the cylinder head or the guide itself. When removing guides, ensure the driver is aligned perfectly to apply even pressure.
For installation, gently drive the new guide into place, checking frequently for proper seating. Avoid excessive force, as this can distort the guide or head. Proper lubrication can aid the process, ensuring a smooth and accurate fit.
Heating the Cylinder Head for Removal
Heating the cylinder head facilitates valve guide removal by exploiting thermal expansion. Applying controlled heat loosens the interference fit between the guide and the head, reducing the force needed for extraction. Ensure even heating to prevent warping or cracking of the head material.
Caution is vital; excessive heat can cause damage. After heating, promptly use a valve guide driver to remove the guide while the metal is still expanded, maximizing ease of removal.
Pressing Out Old Valve Guides
Pressing is a common method for removing old valve guides, requiring a valve guide removal tool and a press. Ensure the head is supported correctly to avoid damage during the procedure. Apply steady, even pressure, monitoring for smooth movement.
Avoid excessive force, which could distort the cylinder head. If resistance is met, re-evaluate heating or consider alternative removal techniques to prevent damage to the head itself.

Valve Guide Inspection
Thorough inspection reveals wear and damage; measure the bore carefully. Identifying valve guide types is crucial for selecting appropriate replacement parts and methods.
Checking for Wear and Damage
Carefully examine valve guides for visible signs of wear, such as scoring, pitting, or excessive play. Utilize a valve stem to assess the guide’s internal diameter, noting any looseness or binding. Look for cracks or deformation, especially near the top where heat stress is highest. A dial indicator can precisely measure guide movement, revealing radial wear. Any significant damage necessitates replacement to maintain proper valve control and prevent oil leakage, ensuring optimal engine performance.
Measuring Valve Guide Bore
Accurately measure the valve guide bore using an inside micrometer at multiple points – top, middle, and bottom – to detect ovality or taper. Record these measurements and compare them to the manufacturer’s specifications. Deviations indicate wear requiring attention. A bore gauge can also reveal subtle changes in diameter. Precise measurements are crucial for selecting the correct size replacement guides, ensuring a proper fit and optimal valve alignment for peak engine efficiency.
Identifying Different Valve Guide Types
Valve guides come in integral, replaceable insert, and false guide varieties. Integral guides are machined as part of the cylinder head, while insert guides press into the head. False guides utilize a sleeve inserted into the original bore. BronzeWall 2 coil-type liners represent another option. Correct identification is paramount; replacement methods and required tools differ significantly based on the guide type present in your engine.
Valve Guide Installation Methods
New valve guides are installed using a driver, requiring careful preparation of the cylinder head and precise sizing with a reamer for a proper fit.
Preparing the Cylinder Head
Before installing new valve guides, thorough cylinder head preparation is crucial. This involves meticulously cleaning the valve guide bores to remove any debris, old adhesive, or corrosion. Inspect the bores for any damage or irregularities that might compromise the new guide’s fit.
Ensure the valve seats are in good condition, as proper seating is essential for optimal valve function post-installation. Addressing any seat issues before guide installation streamlines the overall process and ensures a reliable outcome.
Installing New Valve Guides with a Driver
Using a valve guide driver ensures precise and controlled installation of new guides. Apply a light coating of assembly lube to the guide’s outer surface for smooth insertion. Carefully align the driver with the guide and gently press it into the cylinder head bore.
Avoid excessive force, as this can damage the guide or head. Continuously check alignment during the process, ensuring the guide seats fully and squarely within the bore for optimal performance.
Using a Reamer to Size Valve Guides
After installation, a reamer precisely sizes the new valve guides to the valve stem diameter. This ensures a proper, interference-fit for optimal valve control and sealing. Select the correct reamer size for your application and lubricate it generously.
Slowly and carefully ream the guide bore, maintaining a straight and consistent motion to achieve a smooth, accurate finish. Frequent measurement is crucial throughout this process;

Alternative Repair Methods
Several methods exist beyond full replacement, including knurling bores, installing bronze liners, or utilizing insert guides for cost-effective valve repair solutions.
Knurling Valve Guide Bores
Knurling offers a repair option when valve stem wear is minimal, creating a textured surface for a tighter interference fit. This process expands the inner diameter of the guide bore, providing a secure hold. However, it’s a less precise method than replacement and best suited for cast iron heads. Careful control is needed to avoid over-expanding the bore, potentially compromising head integrity and requiring a subsequent guide replacement.
Installing Thin-Wall Bronze Guide Liners
Thin-wall bronze guide liners provide a cost-effective repair for worn valve guide bores. These liners are pressed into the existing bore, creating a new, precise surface for the valve stem. Proper sizing and installation are crucial for a secure fit, often requiring heating the cylinder head. Bronze contributes to engine longevity by maintaining optimal valve function.
Replacing Insert Guides
Replacing insert guides involves removing the existing pressed-in guide and installing a new one. This method is common for cylinder heads designed with replaceable guides. Specialized tools are essential for both removal and installation, ensuring proper alignment and interference fit. This repair restores accurate valve stem control and prevents oil leakage, enhancing engine performance.
Advanced Techniques
Advanced methods include modifying guides for oversize stems, utilizing false guides, and installing BronzeWall 2 coil-type liners for specialized valve repairs.
Modifying Valve Guides for Oversize Stems
When dealing with worn valve stems, or during performance upgrades, modifying valve guides to accommodate oversize stems becomes necessary. This involves carefully reaming the guide bore to precisely match the new stem diameter. Ensuring a snug, yet free-moving fit is crucial for proper valve operation and sealing. Precision is paramount to avoid excessive play or binding, which can lead to valve train issues and reduced engine performance. This technique extends the life of cylinder heads, avoiding complete replacement.
Using False Valve Guides
False valve guides offer a repair solution when the original guide bore is severely damaged or beyond reaming. These are essentially sleeves inserted into the existing bore, providing a new, precise surface for the valve stem. Installation requires careful alignment and secure fitting, often utilizing a specialized driver and adhesive. This method avoids the complexities of complete head replacement, offering a cost-effective restoration option for damaged cylinder heads, maintaining optimal valve control.
Installing BronzeWall 2 Coil-Type Liners
BronzeWall 2 coil-type liners represent a modern solution for valve guide repair, offering exceptional durability and precise fit. These liners are installed using a specialized tool, expanding the coil into the existing guide bore. This creates a tight interference fit, restoring the original guide dimensions. They are particularly effective for high-performance engines, providing superior wear resistance and contributing to long-term engine reliability and optimal valve function.
Post-Installation Procedures
Following valve guide replacement, valve seat machining is crucial for proper sealing and optimal valve performance, ensuring a reliable and efficient engine operation.
Valve Seat Machining
Valve seat machining is a critical post-installation step after valve guide replacement. It ensures a perfect seal between the valve and the seat, maximizing compression and preventing combustion gas leakage. This process involves precisely grinding the valve seat angles to match the valve face. Proper machining guarantees optimal engine performance, efficiency, and longevity, addressing any imperfections created during the replacement process and restoring factory specifications.
Valve Lapping
Valve lapping follows valve seat machining, refining the seal created during that process. It involves applying lapping compound to the valve face and rotating it within the seat, creating a flawless mating surface. This ensures optimal compression, minimizes leakage, and maximizes engine power. Careful lapping compensates for minor imperfections, guaranteeing a tight seal and contributing to the engine’s overall efficiency and reliability after valve guide replacement.
Valve Spring Installation
Following valve lapping, proper valve spring installation is crucial for correct valve operation. Use a valve spring compressor to safely install the springs, retainers, and keepers. Verify correct spring height and coil bind. Incorrect installation can lead to valve float or failure, negating the benefits of valve guide replacement and potentially causing severe engine damage. Double-check each valve for secure assembly before reassembly.

Troubleshooting Common Issues
Post-replacement, issues like sticking valves or oil consumption may arise. Proper valve guide alignment is key to resolving these problems effectively and efficiently.
Sticking Valves
Sticking valves often indicate improper valve guide clearance or misalignment during the replacement process. This can result from incorrect guide installation, inadequate lubrication, or debris accumulation. Carefully inspect the valve stem and guide bore for damage or binding. Ensure proper valve seat machining and lapping to guarantee smooth operation and prevent future sticking issues, restoring optimal engine performance.
Oil Consumption
Excessive oil consumption frequently arises from worn or improperly installed valve guides, allowing oil to seep past the valve stem seals. A successful valve guide replacement addresses this issue by restoring the correct valve stem-to-guide clearance. Inspect seals during reassembly and ensure proper seating. Addressing this restores engine efficiency and minimizes oil-related problems.
Valve Guide Alignment Problems
Misaligned valve guides can lead to valve binding, uneven wear, and ultimately, engine failure. Precise alignment during valve guide replacement is crucial, often requiring specialized tools and careful measurement. Incorrectly installed guides compromise valve seating and sealing. Thorough inspection and proper installation techniques are essential for optimal engine performance and longevity.
Safety Precautions
Prioritize eye protection and careful handling of hot engine components during valve guide replacement. Employ proper tool usage to prevent injuries and ensure a safe procedure.
Protecting Your Eyes
Valve guide replacement often involves forceful operations like pressing and hammering, creating risks of debris ejection. Always wear approved safety glasses or a face shield to shield your eyes from metal fragments.
Even seemingly minor tasks can generate particles. Prioritize eye safety throughout the entire procedure, as eye injuries can be severe and potentially lead to vision loss. Consistent protection is non-negotiable.
Handling Hot Components
Valve guide replacement frequently requires heating the cylinder head to facilitate guide removal. Utilize heat-resistant gloves and tools when handling these hot components to prevent severe burns. Allow sufficient cooling time before direct handling, even with gloves. Exercise extreme caution, as heated metal retains temperature for extended periods. Prioritize safety to avoid injury during this critical procedure.
Proper Tool Usage
Employing the correct tools is paramount during valve guide replacement. A valve guide driver, reamers, and presses demand careful operation. Incorrect usage can damage the cylinder head or new guides. Always follow manufacturer instructions for each tool. Ensure secure clamping and alignment to prevent mishaps. Prioritize precision and avoid forcing components, safeguarding both the engine and your safety.
Choosing the Right Valve Guides
Selecting appropriate valve guides requires considering material – cast iron or bronze – matching stem diameter, and aligning with the specific engine application for longevity.
Material Considerations (Cast Iron, Bronze, etc.)
Valve guides come in various materials, each with unique properties. Cast iron guides are common due to their cost-effectiveness and good wear resistance, suitable for many engines. Bronze guides, however, offer superior wear characteristics and better heat dissipation, enhancing performance and longevity.
Choosing the right material depends on engine type, operating conditions, and performance goals. Bronze is often preferred in high-performance applications where durability is paramount, contributing to optimal valve function.
Matching Guides to Valve Stem Diameter
Precise matching of valve stem diameter to the guide’s internal diameter is crucial for proper valve control and sealing. An incorrect fit leads to valve wobble, oil consumption, and reduced engine performance. Always verify the stem diameter before selecting replacement guides.
Slight interference is often desired for a secure fit, but excessive tightness causes binding. Using undersized guides results in excessive wear and eventual failure, impacting engine longevity.
Considering Engine Application
The engine’s intended use significantly influences valve guide selection. High-performance engines demand guides capable of withstanding increased stress and heat, often favoring bronze or specialized materials. Conversely, standard road engines may suffice with cast iron guides.
Factors like turbocharging or supercharging necessitate more robust guides due to higher cylinder pressures and temperatures. Always choose guides suited to the engine’s specific demands.

Long-Term Maintenance
Regular valve adjustments, monitoring oil consumption, and inspecting valve guides during overhauls are crucial for sustained performance post-replacement, ensuring longevity.
Regular Valve Adjustments
Following valve guide replacement, consistent valve adjustments are paramount for optimal engine operation. Proper valve lash ensures correct valve timing, maximizing performance and minimizing wear on critical components. Regularly checking and adjusting valve clearances prevents issues like sticking valves and maintains a tight seal. This proactive maintenance extends the life of the new valve guides and contributes to overall engine reliability, preventing costly repairs down the line.
Monitoring Oil Consumption
Post valve guide replacement, diligently monitor oil consumption levels. Increased oil usage often signals worn or damaged valve stem seals, or improperly seated valves. Addressing these issues promptly prevents potential engine damage. Consistent monitoring helps identify any developing problems early, ensuring the longevity of the new valve guides and maintaining optimal engine performance. Regular checks are crucial for a healthy, efficient engine.
Inspecting Valve Guides During Overhauls
During engine overhauls, thoroughly inspect valve guides for wear, damage, or looseness. Look for excessive play between the valve stem and the guide bore. This preventative measure identifies potential issues before they escalate. Replacing guides during an overhaul ensures optimal valve control and prevents future oil consumption or performance loss, contributing to a reliable rebuild.